
Woodland Park Zoo Sensory Garden Table Process: Design and Process
The intention of the Woodland Park Zoo (WPZ) Sensory Garden is to give people of all abilities a space to enjoy and explore. Although the idea of a sensory garden is not new, more and more institutions and public spaces are working to be inclusive and inviting to differently-abled people beyond the straightforward rules of the ADA (Americans with Disabilities Act.)
As a planner or designer, it is important to acknowledge how design can either create or remove physical, intellectual, or emotional barriers for the users of the space. As the discussion about “otherness” and acceptance wends its way through the American culture at large, we as designers are constantly asking ourselves how we can be better at acknowledging the myriad cultures, races, languages, and abilities that exist within our society.

Overall Concept for the Sensory Garden
As the name suggests “Sensory Gardens” are intended to entice and attract all the senses. Scents, sounds, sights, touch, and even taste can be explored with plantings and features that encourage interaction. Therefore, a diverse array of plantings and built features were proposed for the WPZ Sensory Garden to accomplish the goal of creating an enriching experience for all users.
One of the proposed features was a communal table meant to provide a space for people to come together in planned or unplanned ways. Obviously, it would need to meet the ADA standards for wheelchair users by having plenty of clearance beneath but we wanted to include aspects for the senses as well. We settled on a laser-cut galvanized steel top that would provide visual and tactile interest.
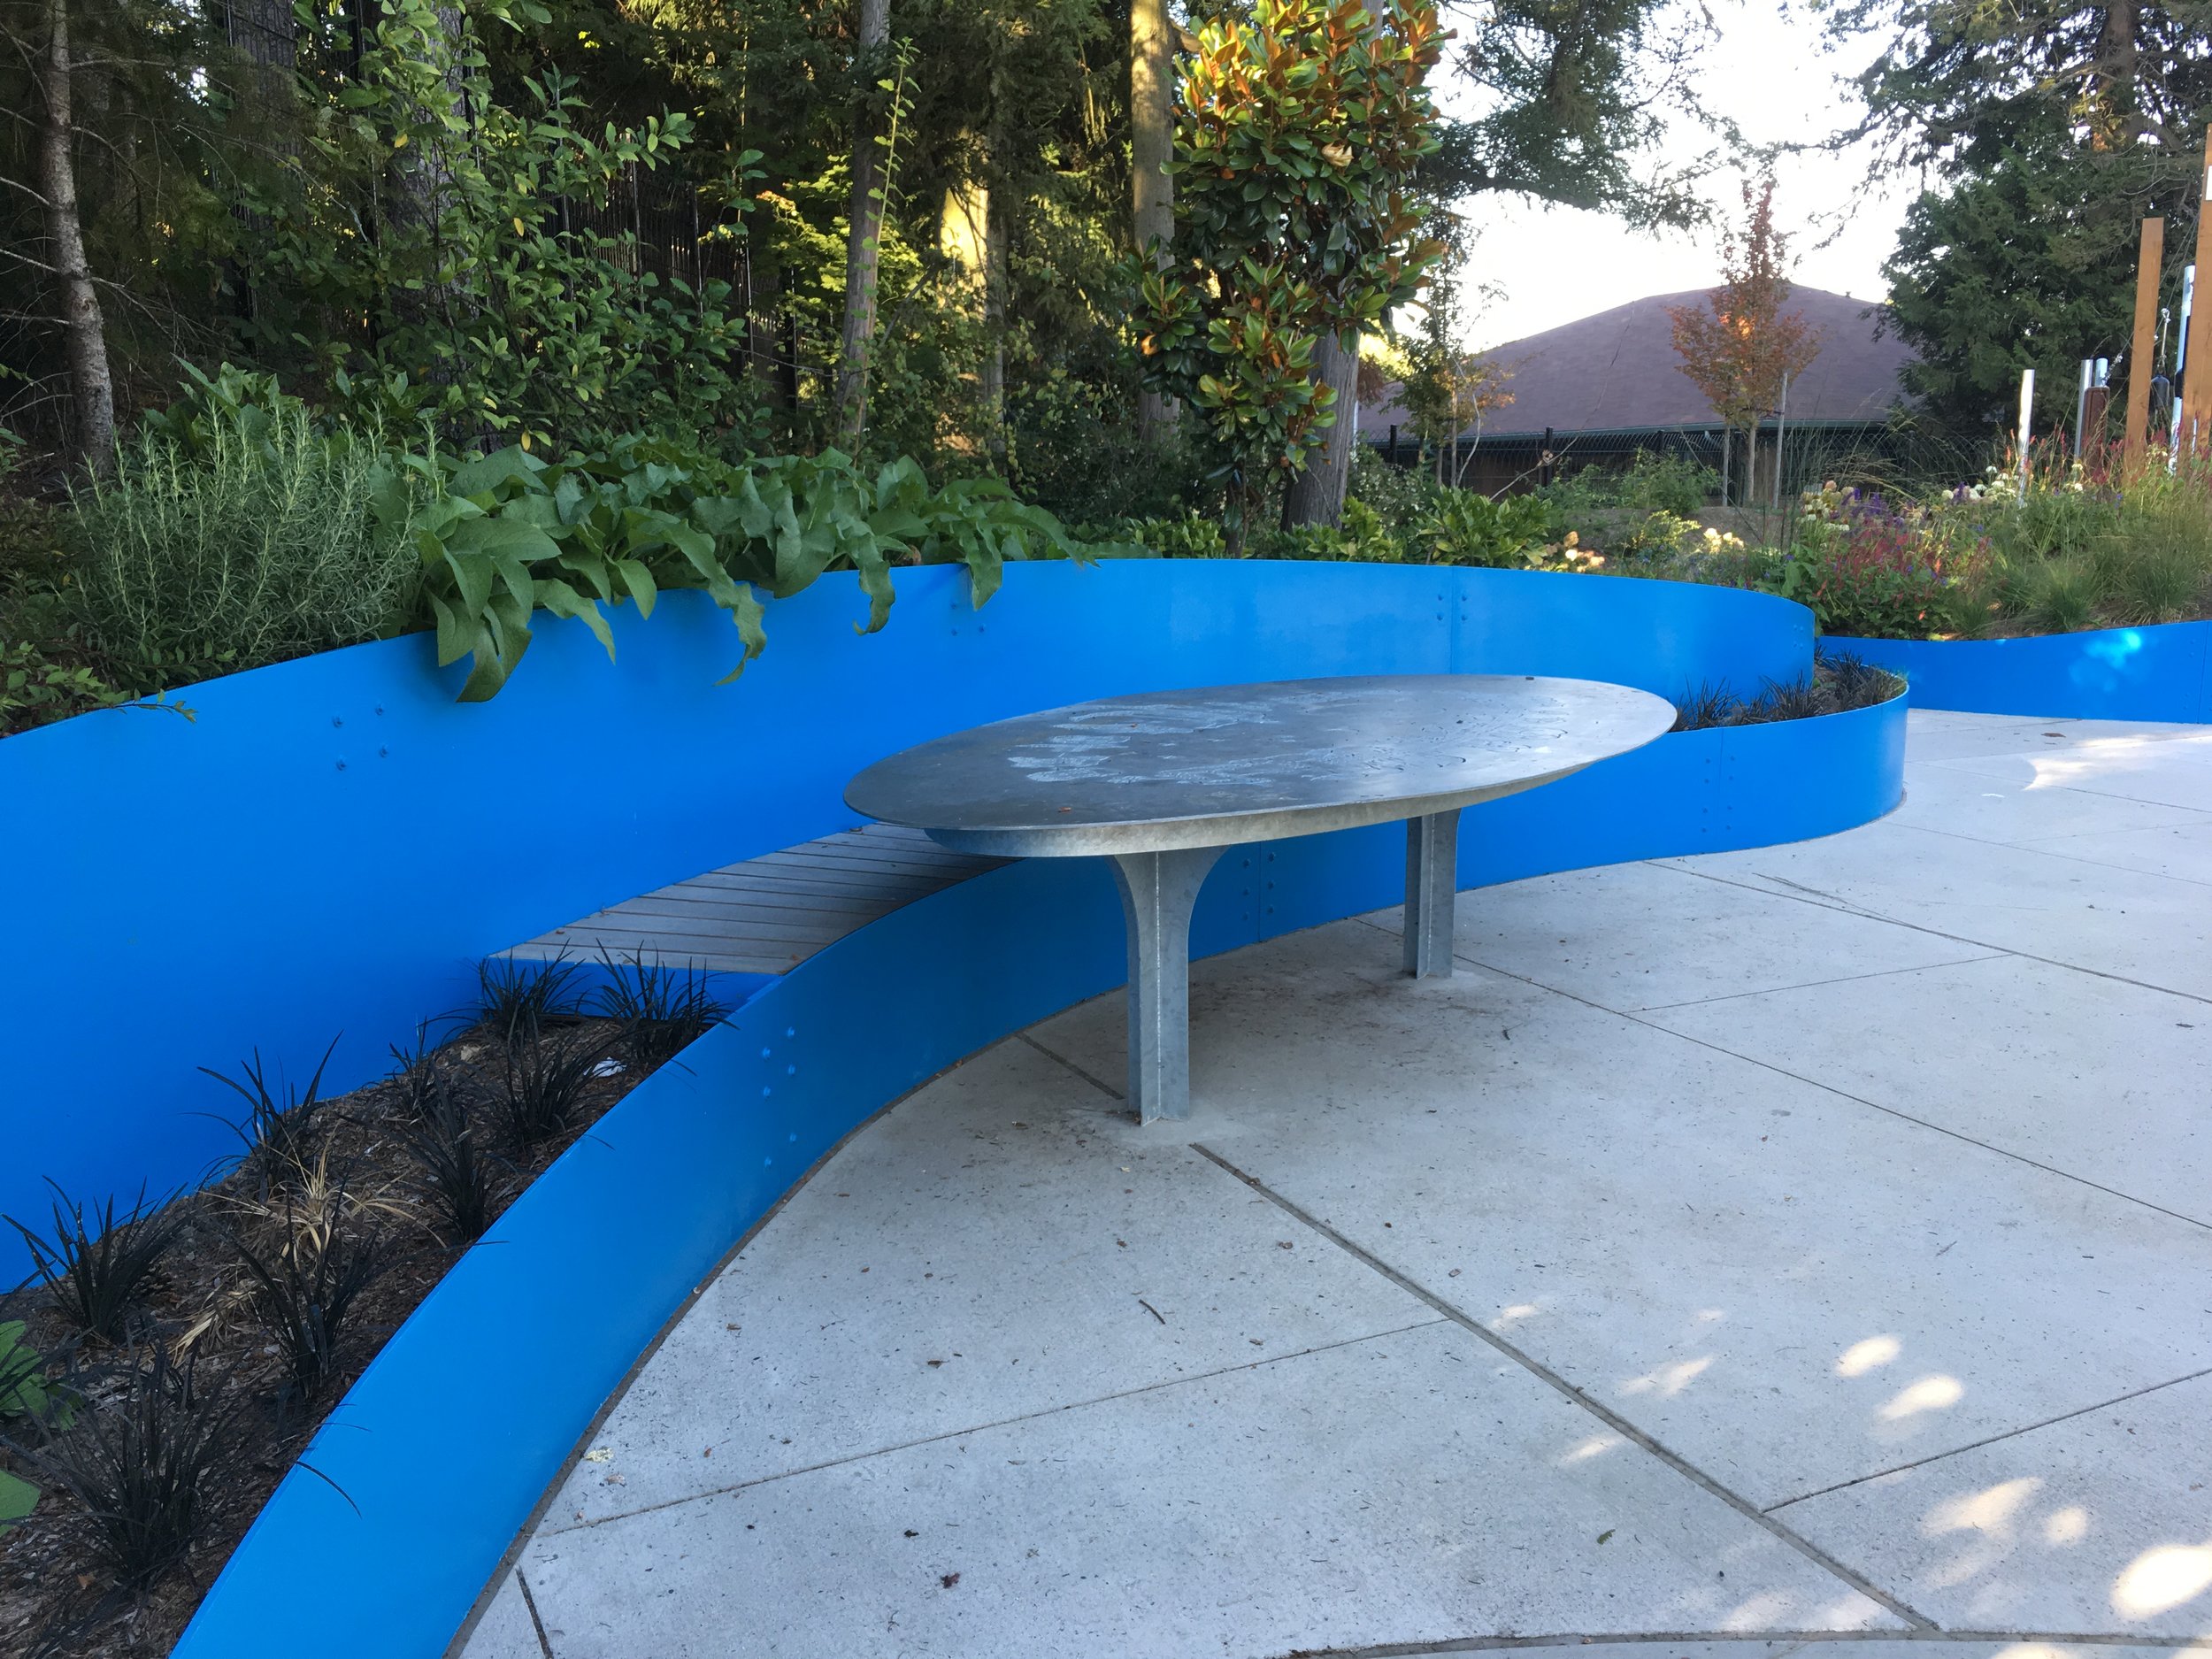
Finished Table nestled up to a permanent bench with plenty of room for wheelchairs
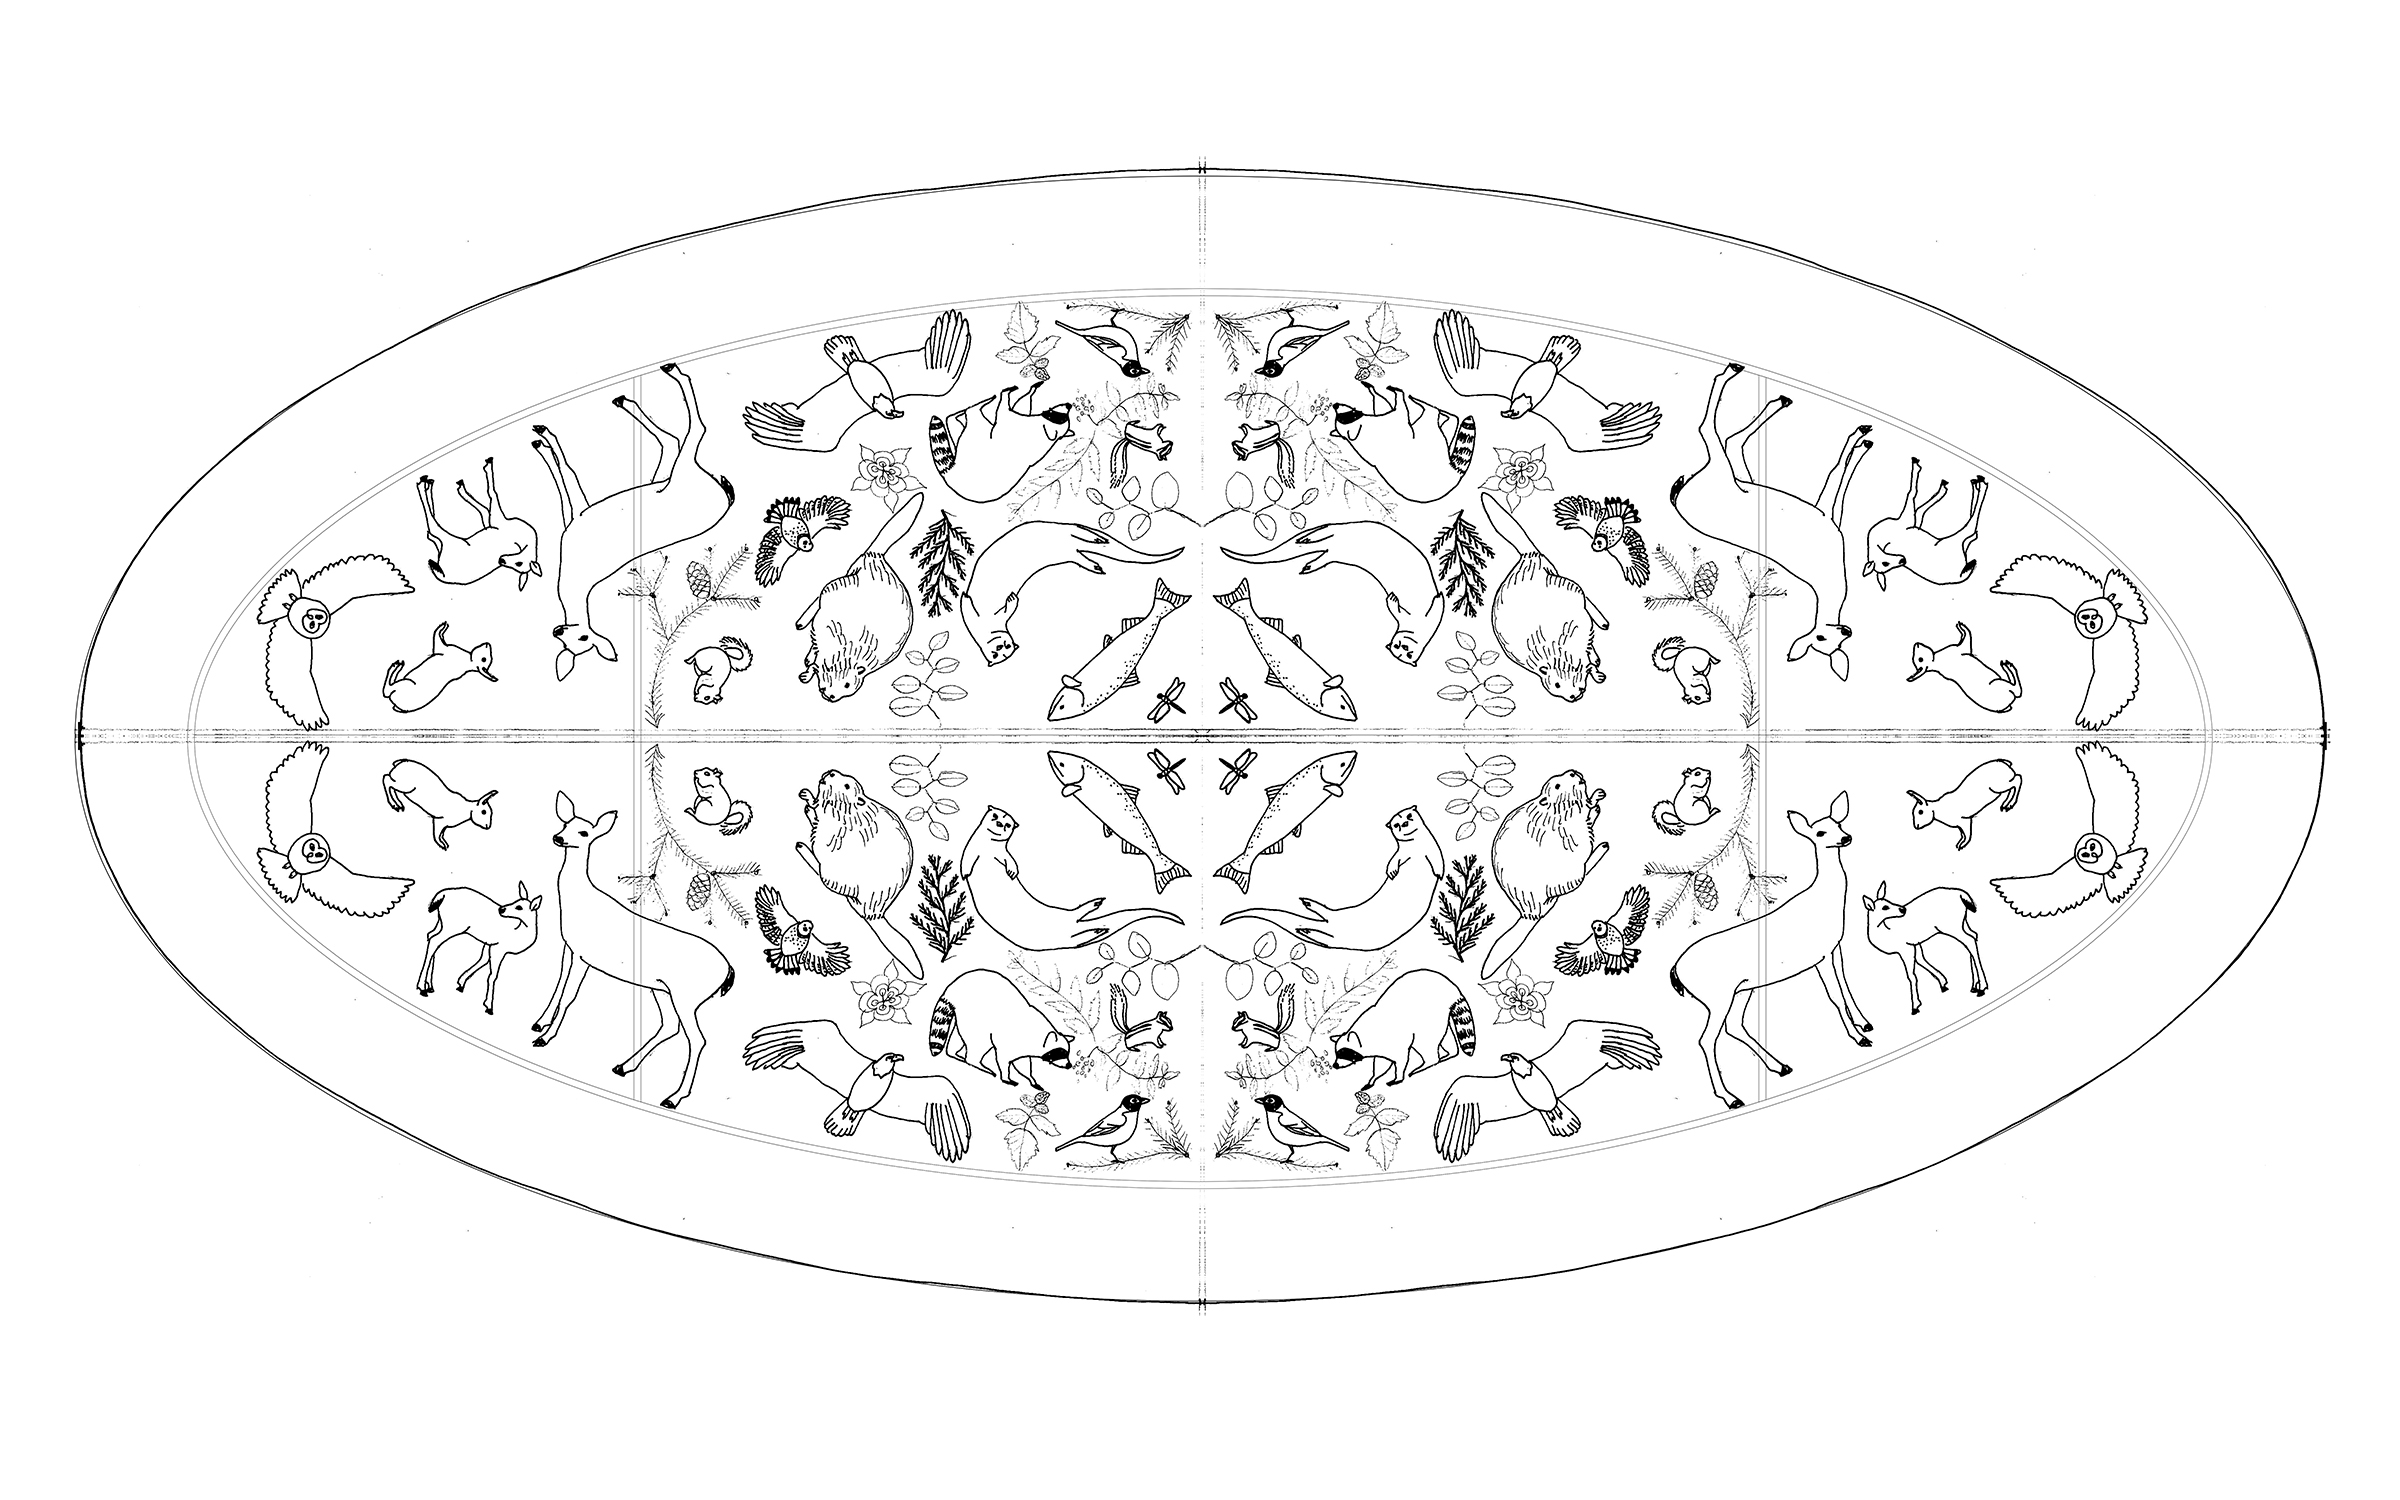
When it came time to figure out the design I happily volunteered, thinking that it would be a straightforward process (nope!) After several false starts trying to figure out a general theme and how to render that theme in essentially black or white (cut or not cut) I arrived at the idea of a watering hole. In times of drought it is not uncommon to find a mixture of animals gathered together to drink where normally they would avoid or attack each other. While not a perfect metaphor for what we were trying to accomplish, it included animals and coming together so I stuck with it.
Initial Concept with Northwest Native Animals and Plants

Final “Watering Hole” Concept
The next challenge came for how to render this in a way that would work for the laser cutting while meeting specifications given to us by Seattle Parks and Recreation. The most important parameter was to have openings no larger than ¼” to avoid adventurous fingers from potentially getting stuck.
The next challenge came when discussing the design with the laser cutting company. Turns out that a rule of thumb for laser cutting is that openings can be no smaller than the width of the steel or you face issues with the metal melting back together or pitting. Therefore, our generous ½” thick table top was going to have to become a flimsier 1⁄4” which of course increases the possibility that the whole top could warp out of shape once the design was cut in.
Waterjet cutting is an option that can help get around this issue but takes much longer and the cost for the cutting is directly related to how much time it takes to complete. We had a small budget for the table so laser cutting it had to be.
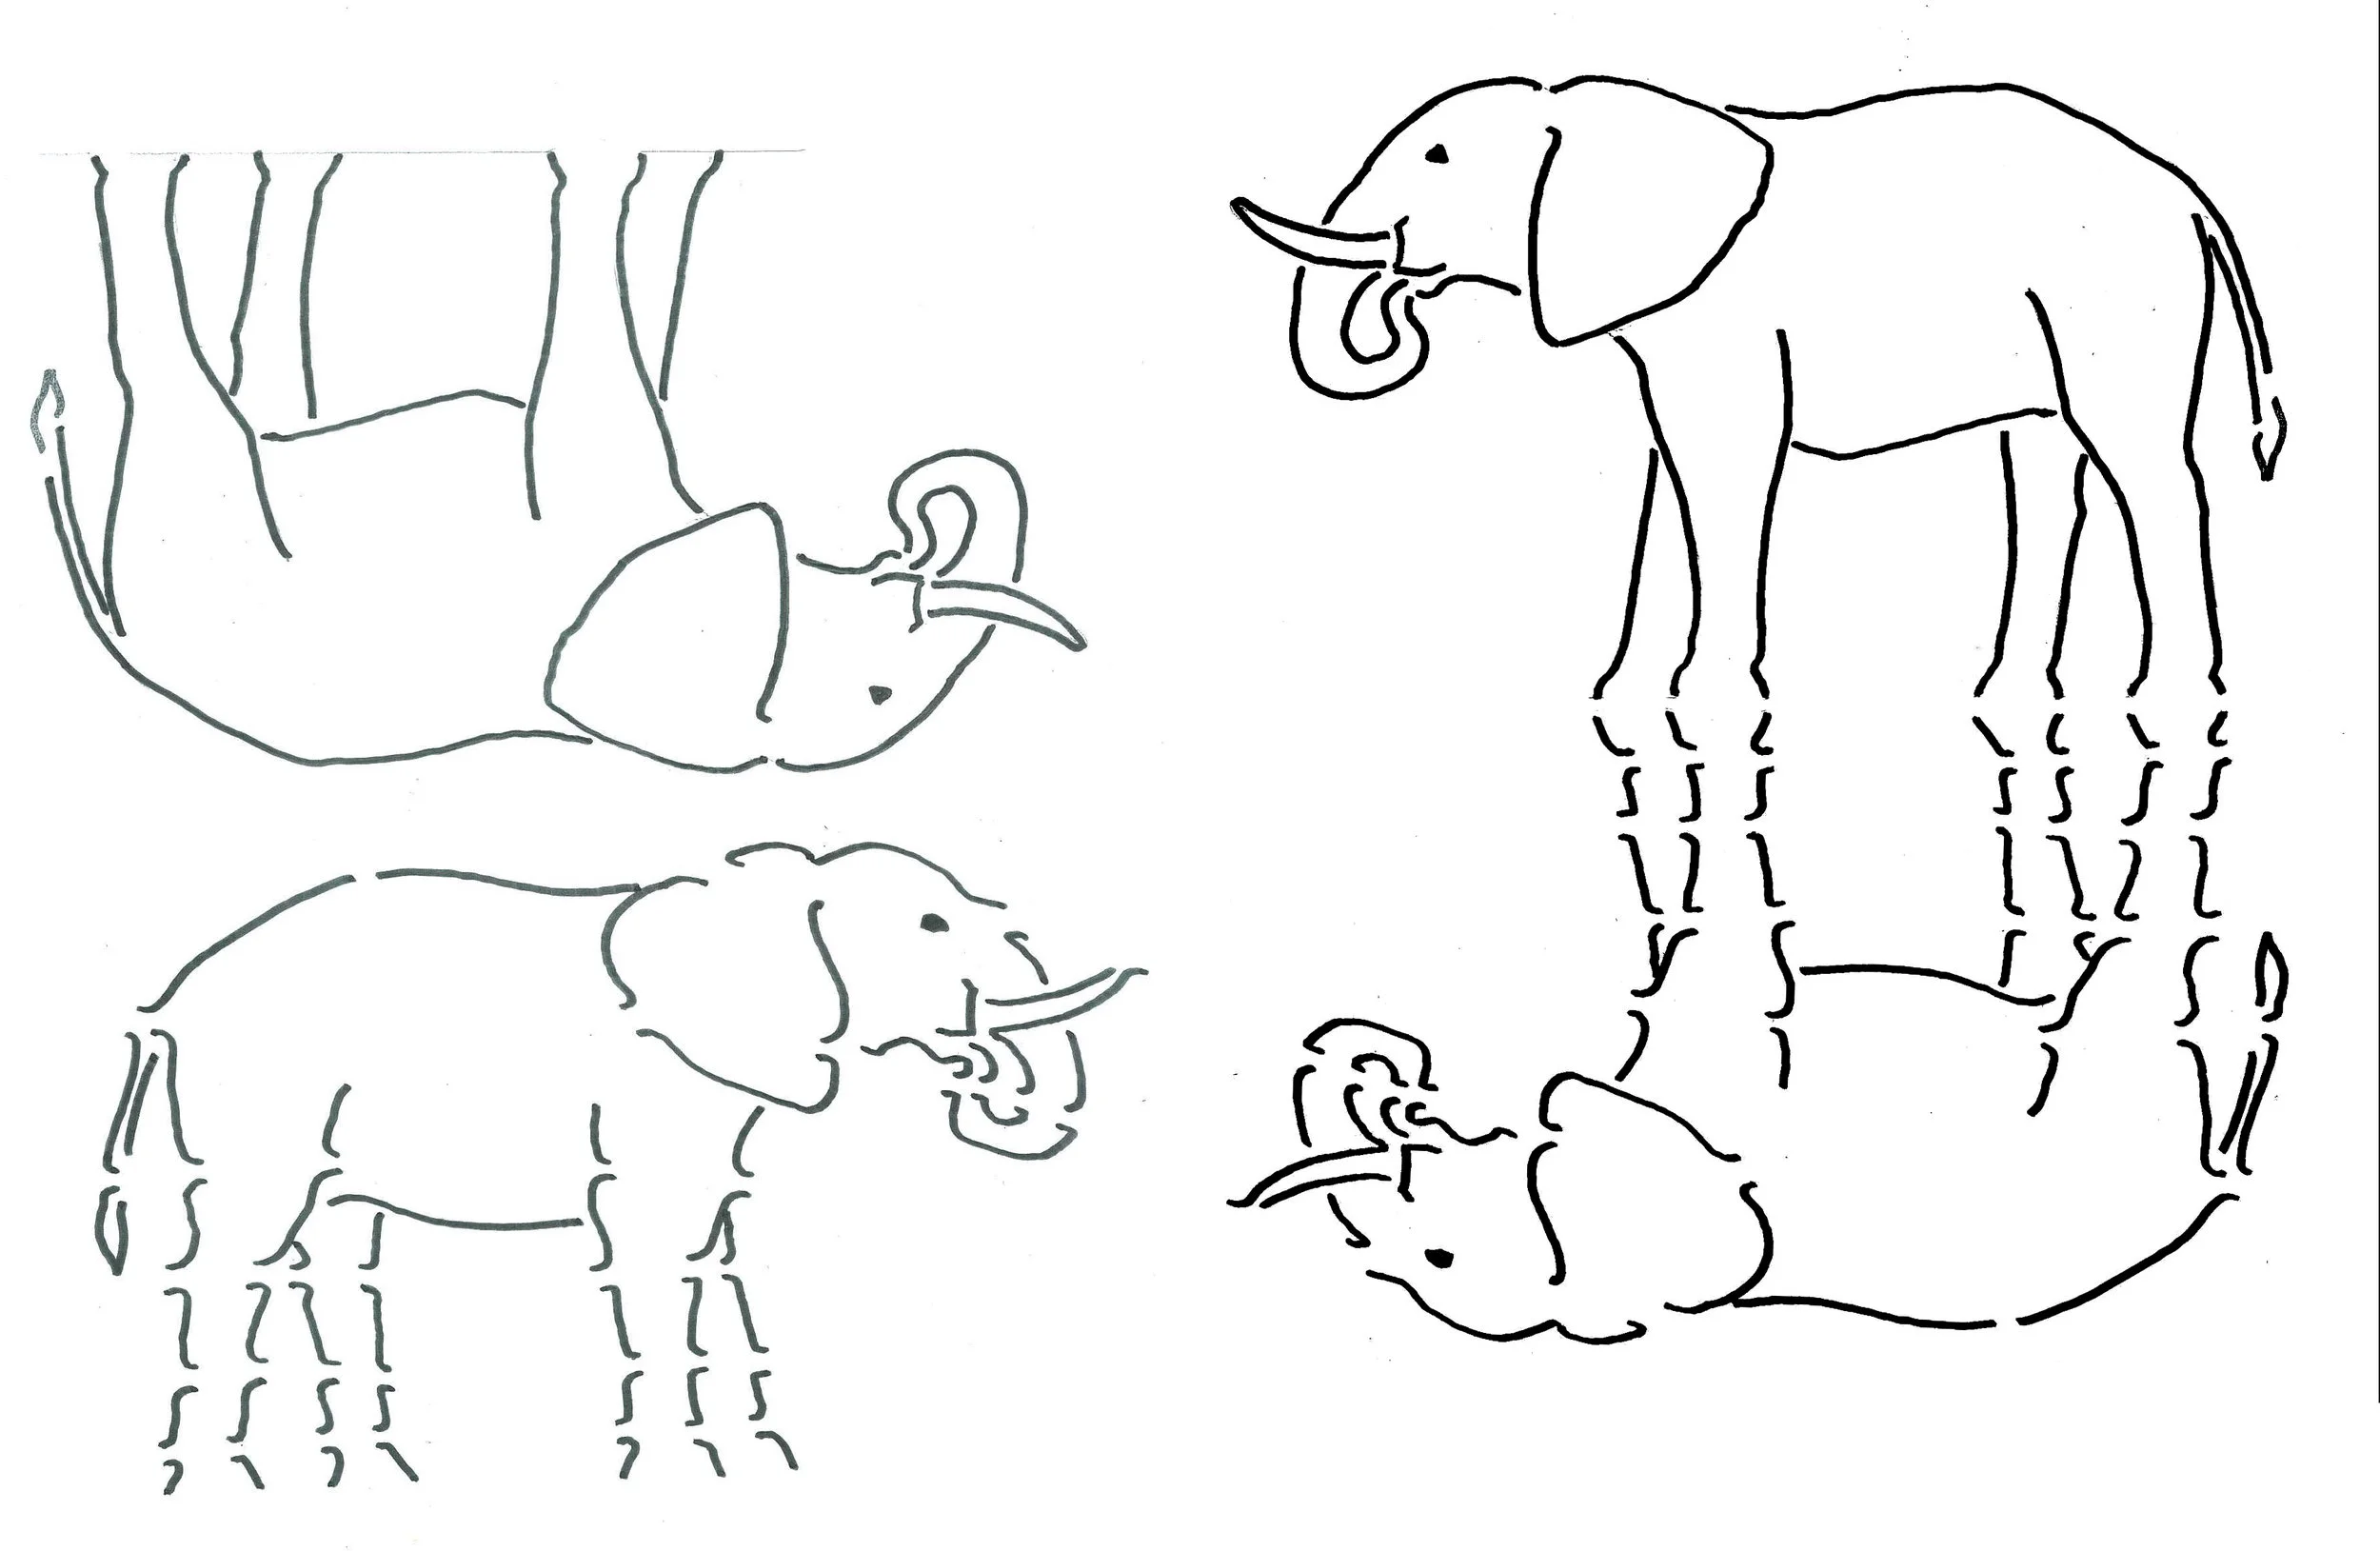
Design process: Initial scan from sketch (left) and cleaned up version from Adobe Illustrator (right)
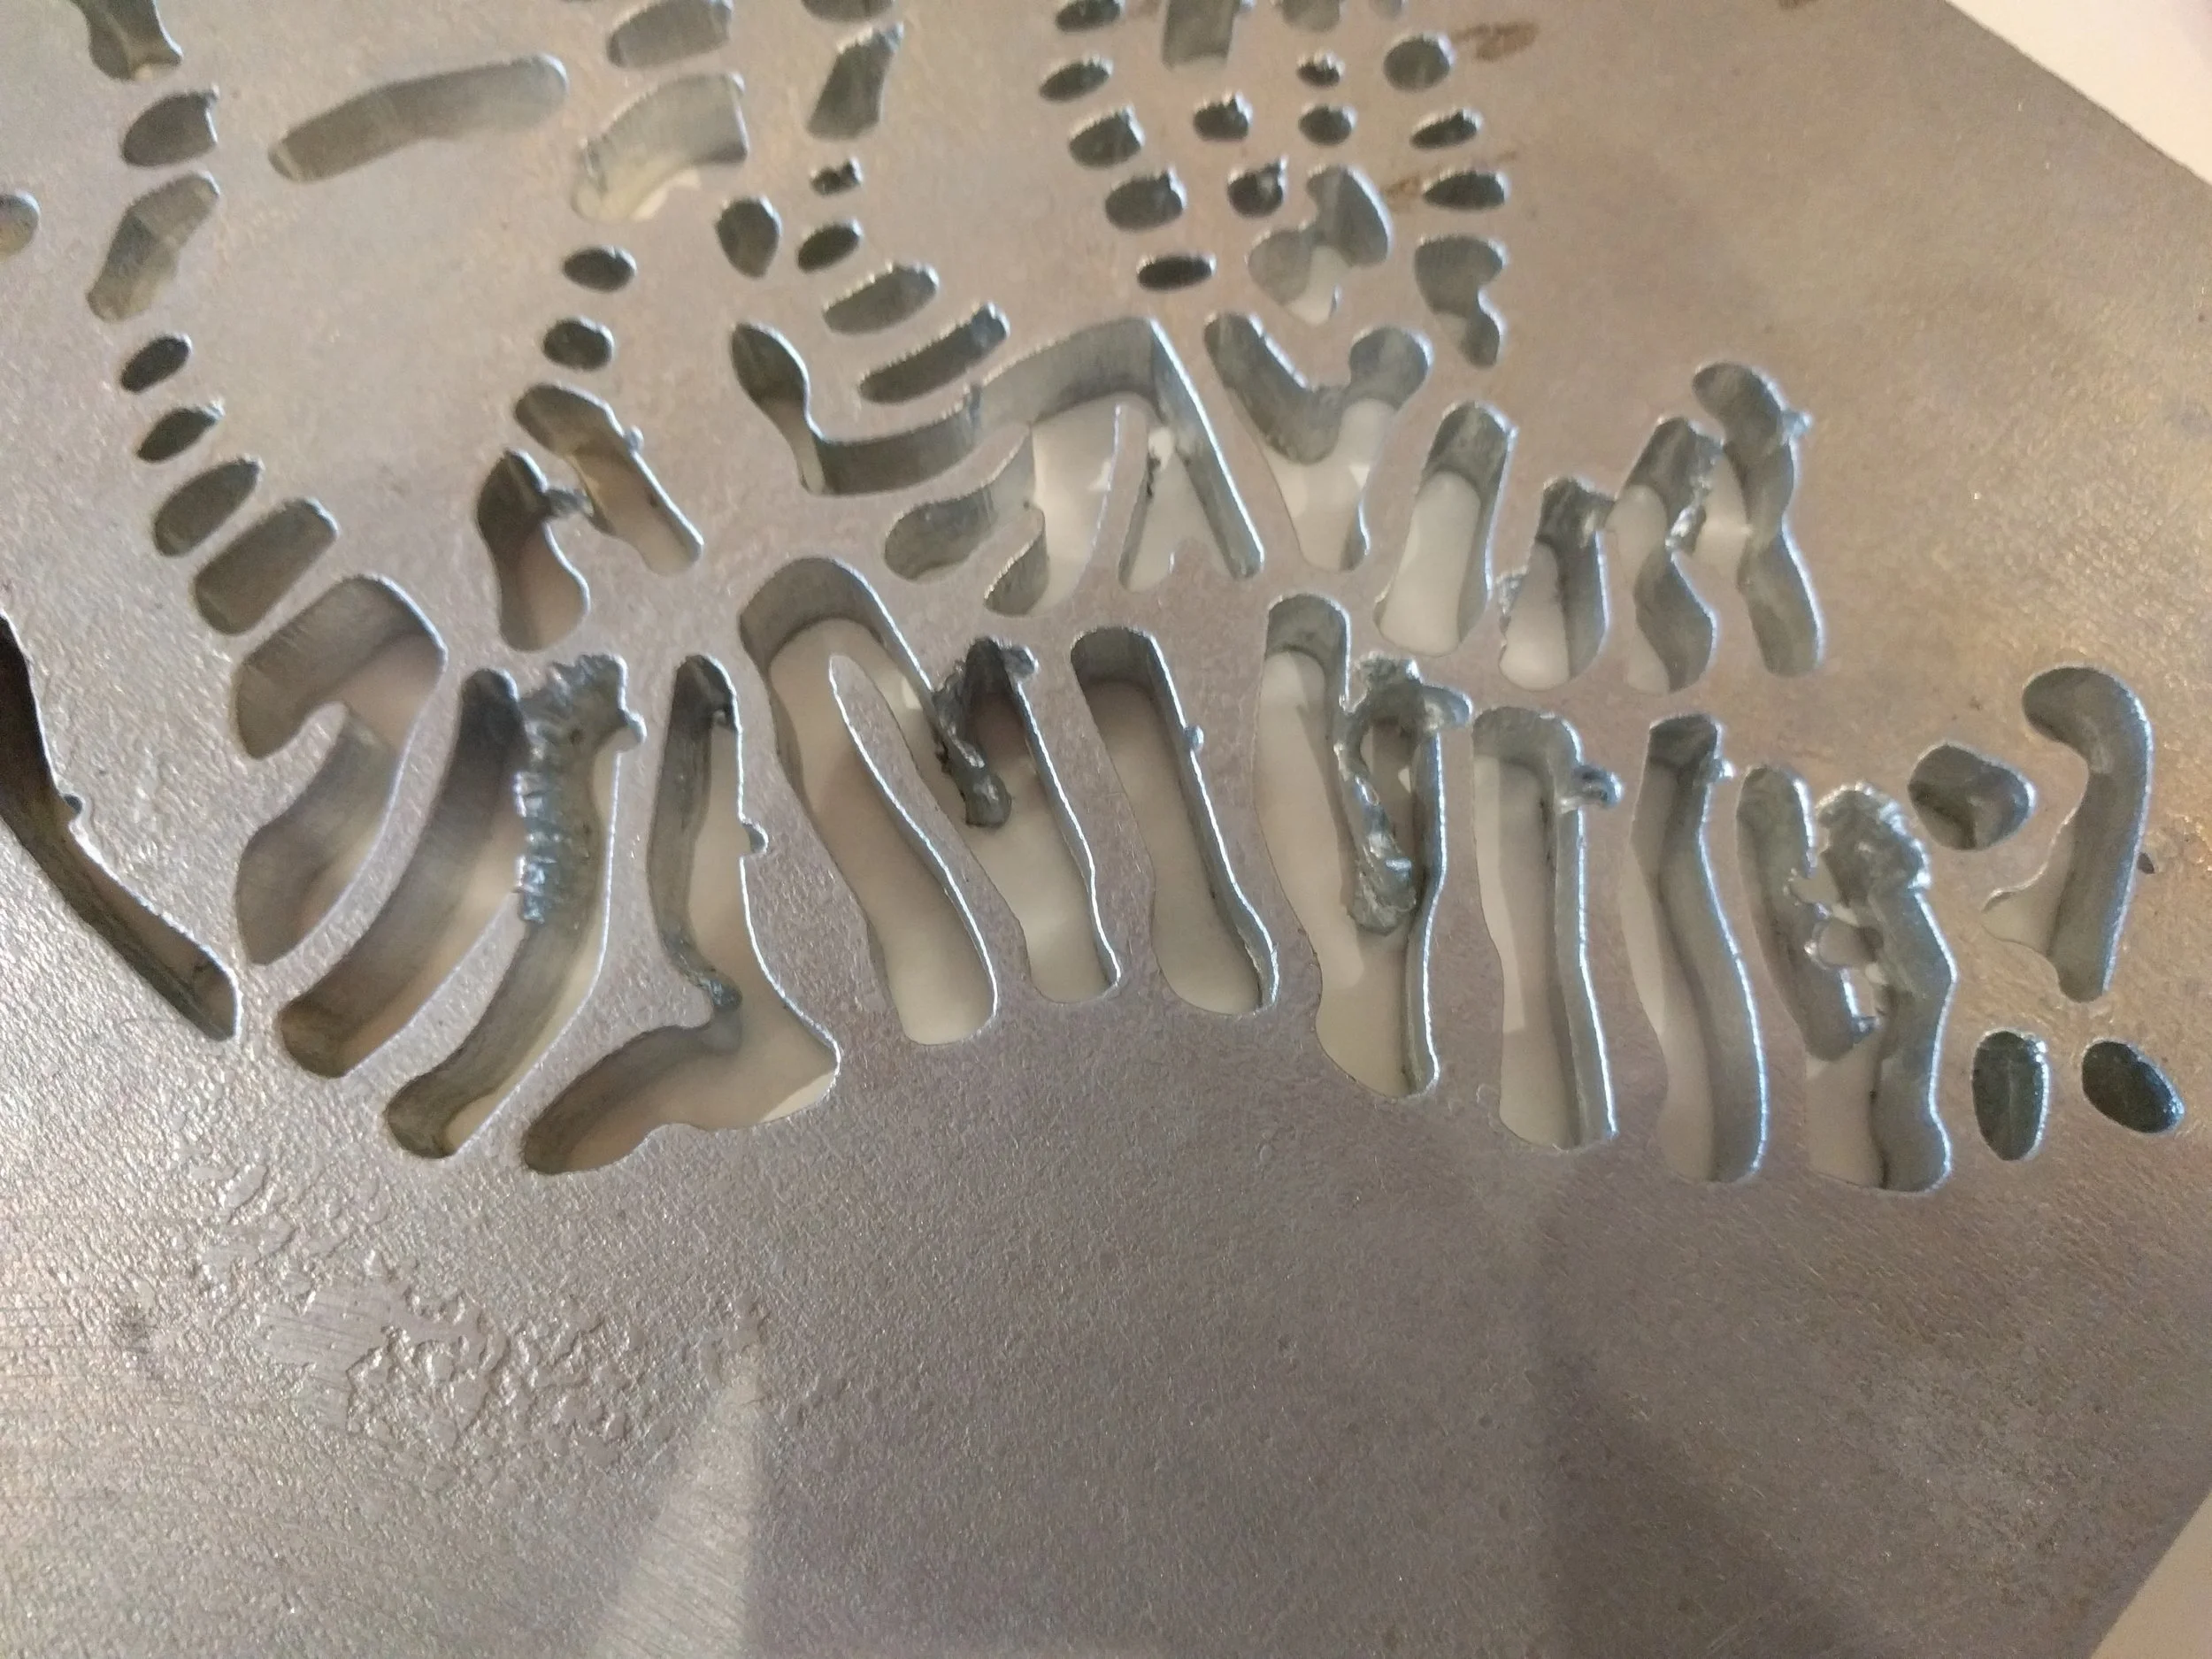
Sample piece showing pitting where the cuts are too close and on “peninsulas”
Now I had to create “lines” that were no thicker than ¼” and no thinner than ¼”. Easier said than done when creating artwork by hand! I ended up sketching out the animals and then trying several methods to translate them into CAD (which was necessary for laser cutting.)
No method was perfect and required a lot of fiddling in order to get right. Eventually though I had something that was somewhat presentable. I was working with Michael at Pepperbox - a metal artisan who would be bringing the whole thing together.
We sent a small sample of the artwork to the cutter to see how it would turn out. There were several issues, mostly involving the “peninsulas” that would occur where one line would meet another and leave a small finger of metal that was less resilient when exposed to the heat of the laser. Time for another round of CAD edits!
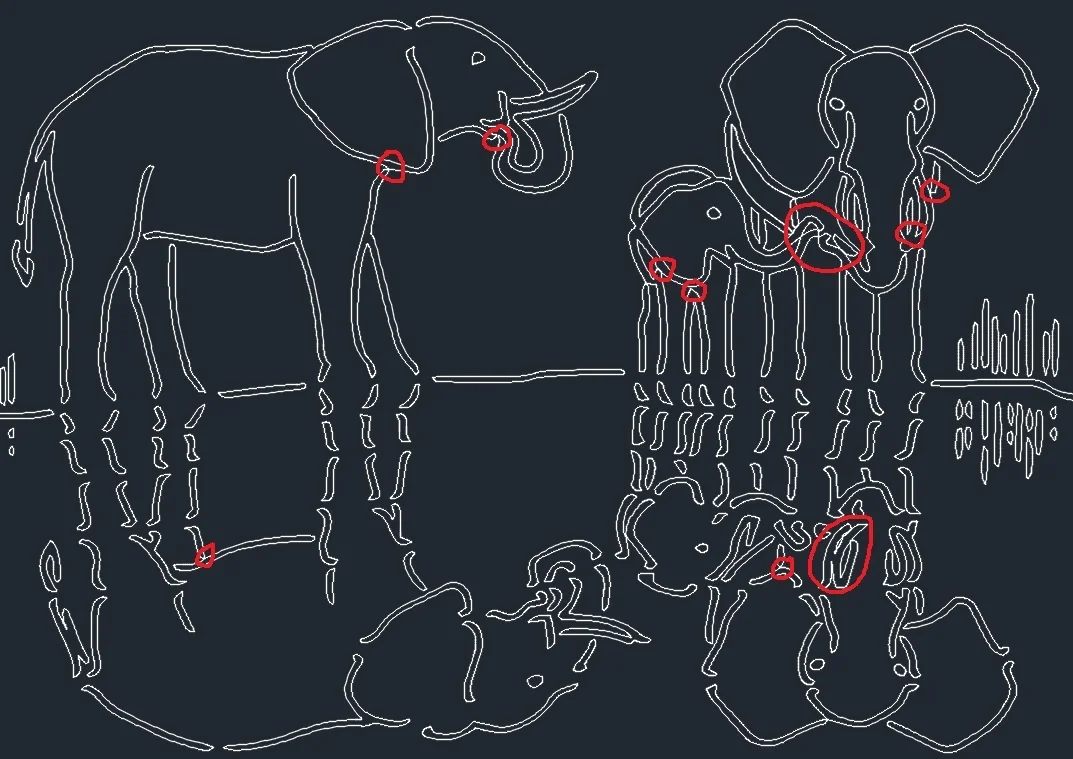
Drawing translated to CAD. Special attention needed at circled areas where lines intersect or are too close. White lines are where the laser will cut.
Finally, the design was ready and sent off to the cutter. The top did warp a bit but since there was supportive internal cross pieces and the table itself would be poured in place at the site, Michael was able to build a temporary frame to hold it true while finishing the fabrication and installing.
After a long journey with lots of setbacks and learning opportunities the table was finished! Was I happy with the outcome? Did my vision get realized? Not completely, but that is often the case with design. By the time your design runs the gamut of stakeholders, budget restrictions, and fabrication challenges, if often does not reflect the original vision.

Final Design awaiting cleanup and installation